In a post, I told how to create a localhost website using Apache server in Ubuntu. It worked on all versions up to Ubuntu’s 10.10th version. But on Ubuntu versions 11.04 and the versions released after it, there were some changes to the Apache server.
So, by this post I’m going to update the way to create a localhost hosted website in Ubuntu versions 11.04 and the versions that came after 11.04 or 2011 April. Some of them are :
- 11.04
- 11.10
- 12.04
- 12.10
- 13.04
- 13.10
- 14.04
- 14.10
Install Apache Server
First of all, we will install the Apache server. Open the terminal (CTRL + ALT + T) and do the following command :
sudo apt-get install apache2Say Yes when the program asks for confirmation. In a while, the package apache2 will be downloaded and installed automatically. Folders and configuration files of Apache will automatically be created. To make sure that Apache has installed properly, visit the localhost website.
If installed properly and successfully, you will get a page like this :
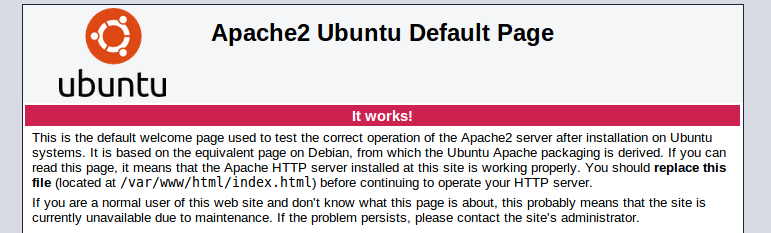
"It works". What a feeling, right ? You just completed the first step successfully
Create a Site
Now let’s create a site that is hosted by the Apache server we just installed on your computer which is a accessible only by you.
For this tutorial, we are going to create a site called "mysite" which is accessible by the domain "mysite.com".
The Site’s configuration file is stored in the following directory :
/etc/apache2/sites-availableAs you can see, you need Root Access for making changes in the directory. So, open the terminal and do this command :
sudo -iYou will be asked for the root password. Type it and press Enter (The password won’t be showed at all in Terminal while you type). You will now enter the root shell.
Now, let’s create the configuration file of the site "mysite" we are going to create. As I said before, the site’s configuration file should be kept in "sites-available" directory.
On the root shell, do this command to create an empty file in "sites-available" directory :
touch /etc/apache2/sites-available/mysite.confNow, let’s add some text to the file we created. Using gEdit or other text editors, edit the file we created using root :
gedit /etc/apache2/sites-available/mysite.confUsing the text editor leafpad, we edit the file with the following command :
leafpad /etc/apache2/sites-available/mysite.confWhatever the text editor is, the contents of the file will be the same. Here is the content that you should copy & paste to the file :
<VirtualHost *:80>
 ServerAdmin webmaster@localhost
 ServerName <span style="color: #ff0000;">mysite.com</span>
 DocumentRoot <span style="color: #ff0000;">/home/username/websites/mysite</span>
 <Directory <span style="color: #ff0000;">/home/username/websites/mysite</span>/>
  Options Indexes FollowSymLinks
  AllowOverride All
  Order allow,deny
  allow from all
  Require all granted
 </Directory>
 ErrorLog /var/log/apache2/error.log
 LogLevel warn
 CustomLog /var/log/apache2/access.log combined
</VirtualHost>
The highlighted text of color red should be changed according to you. Here is a summary of the changes that should be done in the file :
| String |
| mysite.com |
| /home/username/websites/mysite |
| /var/log/apache2/error.log |
| /var/log/apache2/access.log |
The red highlighted text in the table above is the most important strings. It should be changed by you or not if you want the site’s domain as "mysite.com".
If you changed the location of the log files, make sure that the location exists. If it’s to a new directory, you should create the new directory. The "access.log" and "error.log" file will be automatically created by Apache even if it doesn’t exist. Save the configuration file and close the text editor.
Now, we should enable the site. Do the following command in root shell :
a2ensite <span style="color: #ff0000;">mysite.conf</span>The red highlighted text above is the name of the file we created in the "sites-available" directory. If you chose a different name, change it when you enter the command in Terminal.
A restart of the Apache server is needed after enabling the site. So, do this command :
/etc/init.d/apache2 restartor do the following command :
service apache2 restartThe site is created in localhost. But, still when you visit "mysite.com", the browser will go to the original "mysite.com" that is in the web. Browser or the network of your system doesn’t know that there is a "mysite.com" hosted in localhost. So, we should make it understand. For this, on the root shell do this command to edit the "hosts" file :
gedit /etc/hostsAt the end of the file, add the following line :
127.0.0.1 mysite.com"127.0.0.1" is the IP Address of localhost and the other string we typed aside it is the domain name. Save the file and close the terminal.
Now, open a browser and go to the site "http://mysite.com" and you will see your own localhost site. You can add the site’s files to the directory you mentioned in the configuration file we created. index.html will be the main file of the site. This main file will be shown when the site is directly visited (http://mysite.com).
Happy coding. 🙂