A custom email account on your own domain is useful for various purposes. By getting an own domain email name makes you not to disclose your personal mail and use the work email for disclosing. Email account on a custom domain is costly these days. Google Apps increased the price of their plan, which makes it impossible for custom email addresses.
But, Microsoft Outlook is giving it away for free ! They will host the Email address for you free of cost. Only you have to do is, create a account on Microsoft Live. You will find the step by step instructions for setting up a custom email address on your domain.
I will prove it to you by disclosing the email address set up on this domain : [email protected]. To get a E-Mail address like mine you should have a Microsoft Account. If you don’t have one yet, signup for it.
Add Domain
Go to the Signup Domain Page. The page will be like below :
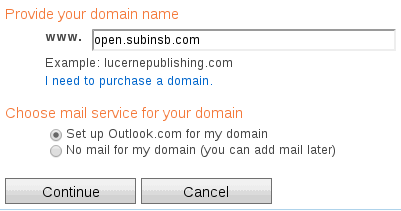
Type in the domain name and choose "Set up Outlook.com for my domain" option. Once filled, click Continue button.
You will be asked for assigning a domain administrator :
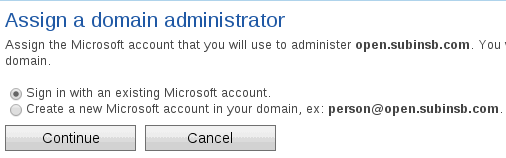
Choose the 1st option since you already signed up for a Microsoft account. When you click "Continue", the Login page will be shown. Log in with your Microsoft account. You will be redirected back to the domains page :
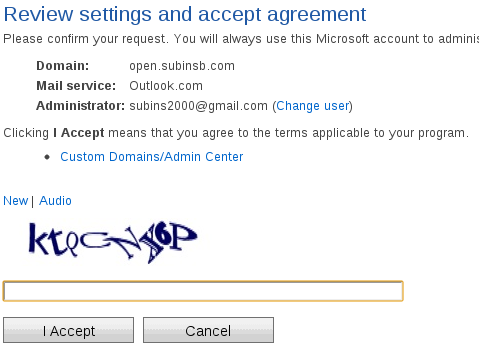
Make sure the details are correct. Then type in the captcha and click on "I Accept" button. If the captcha was correct, you will be redirected to your domain page.
Verify Domain
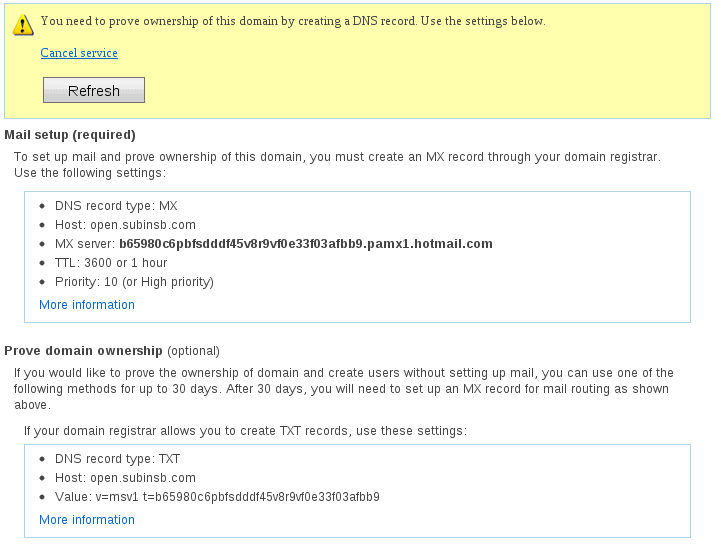
The domain page will ask you to add a MX record to your site. You should only add the first MX record shown. It’s not necessary to add all the other records. Remember to make the record priority at the highest number than other MX records.
Once you added the MX record, click on "Refresh" button. If verified, the page will reload. To check if it has been verified successfully, go to the Domain Dashboard. If there is a green circle besides your domain, then it’s verified :

Add Account
Click on your domain where you want to add an E-Mail account. Click the "Add" button on the page where you are now. A Form will pop on your screen. Fill it according to your needs :
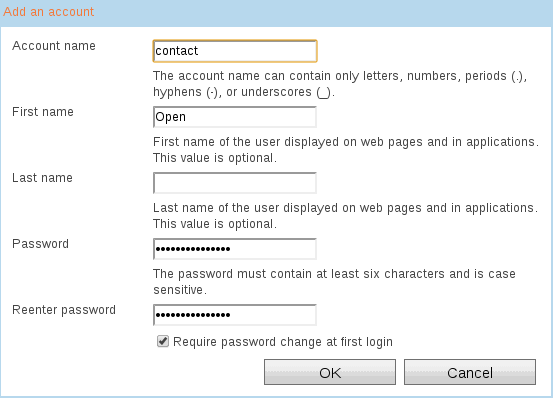
The "Account Name" is the username of the E-Mail address which is situated before the @ character. If the Form is filled like in the above image, the E-Mail address will be :
[email protected]Choose a Password. Note that the form you submit is going to be like creating another account on Microsoft. So be careful while filling the fields. Once you submit the form, a new account will be created. You now have an own E-Mail address on your domain. The E-Mail address will be :
[email protected]An example when I typed mail in "Account Name" for the domain subinsb.com :
[email protected]So, there you go, you own E-Mail address. If you want to access your new account’s E-Mails, Log Out from the current user and login with the E-Mail address of your domain and with the password you typed in when you filled the form. If you checked the "Password Change On First Login" while submitting the form, then you will be asked to change your password. Once that is done, you will be able to access your account.
Mail Software Configuration
If you want to add the account to your Mail Software like "Evolution", here is the server details of incoming E-Mails and Outgoing E-Mails.**
**
Incoming E-Mail
Server Type : POP

Server : pop3.live.com

Use Authentication : Yes

Use Secure Connection : SSL
Outgoing E-Mail
Server Type : SMTP

Server : smtp.live.com

Use Authentication : Yes

Use Secure Connection : SSL
If you have any problems, or have a suggestion please comment it.